
Things left behind...
... otherwise known as 'grot I left on the garage windowsill'
[finished version on my [url=http://www.blipfoto.com/entry/1377938]Kinda Horrigans[/url] journal]
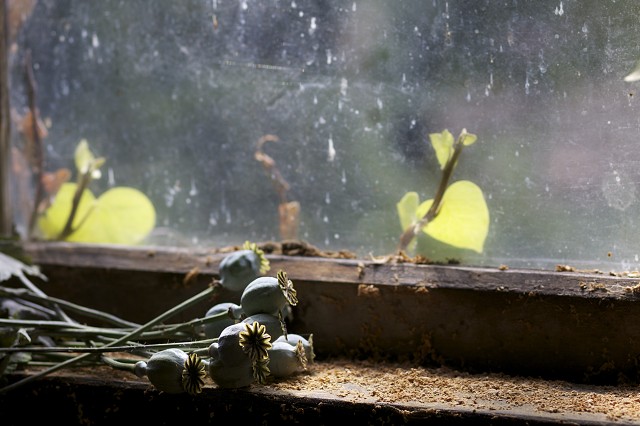
The first big difference between these two images is the colour to mono conversion. Some how the cobwebs and mess of our old garage together with the poppy seed heads I'd left to dry there seemed to suggest that mono would be good.
As normal, I started with my RAW file and gave that a slight tweak - increasing the fill light to +11 and decreasing the brightness slightly. I also decreased the blacks and upped the contrast. What I was after was something fairly structural with good contrasts to convert to mono. Then, opened the shot in Photoshop. I then duplicated the background layer and selected Filter > Render > Lighting Effects and applied an omni spotlight to the area where the seed heads were on the windows sill. Set the blend mode of that layer to lighten and in doing so, only the bits which are brighter than the original get brightened. The bit which is left dark by using a spotlight therefore doesn't affect the image.
Then, I was ready to convert to black and white. I used Silver Efex Pro for this and started with a preset of Antique Plate because it brings out the textures nicely. I took the sepia effect down to something a little more subtle, increased the structure, upped the brightness and dropped the contrast a little. Then back into Photoshop to finish off. What I wanted was to bring out the hightlights around the edge of the seed heads and darken the edges slightly so I created a new layer by doing Layer > New then selected Overay mode and put a tick in Fill with overlay neutral colour 50% gray). If you then paint on this layer with a white brush you lighten areas (i.e. dodge them) and with a black brush you darken areas (i.e. burn them). This is a non-destructive dodge and burn technique as your background layer is left alone. I normally set my brush to about 10% opacity for a white brush and 5 - 10% for the black brush.
Final thing? Flatten, then sharpen edges... and... save.
Tip of the day:
Nothing to do with today's image, but I saw an article on Creating an HDR Image without HDR software and this is a 'note to self' for me to have a go another day! I've done something similar before, but this takes it a step further so will be fun to have a go!
245
views
- 0
- 0
- Canon EOS 50D
- 1/100
- 85mm
- 100
Comments
Sign in or get an account to comment.


