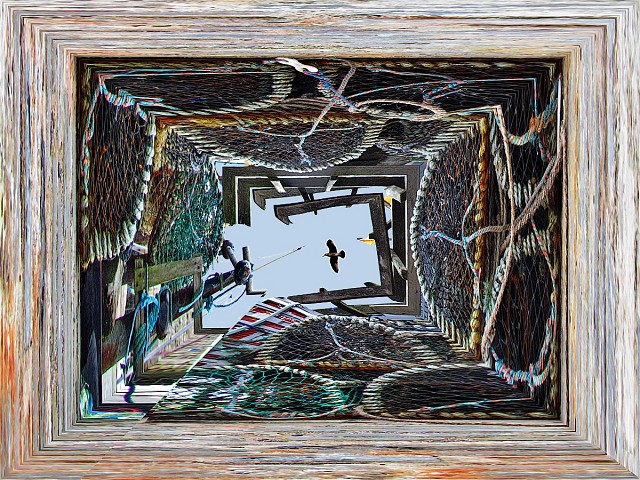
Lobster Pots, Dysart Harbour
Not a great day for photography. Windy, occasional rain, overcast and dull.
Took about a dozen snaps at Dysart Harbour and decided none were suitable as straight images.
This one has had help from a filter called 'polar coordinates' and the seagull came from an image taken a few minutes later.
No added frame - that is just the concrete harbour surface in the foreground which has been stretched around the image by the GIMP filter.
[EDIT]
AJTaylor asked how I manipulated my 'Lobsterpots' - Here is my answer.
Not sure how familiar you are with image manipulation programs - I use the free program GIMP (GNU Image Manipulation Program) but Photoshop and probably PainshopPro should be able to perform similar manipulations.
Here are my secrets:
1) Colour / Contrast / Saturation
I normally create 3 layers for Colour > Auto > Colour Enhance, Colour > Auto > White Balance, Colour > Auto > Equalise.
I then adjust the opacity of the layers to get the desired balance. Furthermore, I often change the combine mode for the last one to 'multiply', or sometimes 'soft light' at around 30% opacity.
Another filter that I often use if I want to add some graininess and contrast (as in my rusty metals images) is Filters > Artistic > Multiply combined in either Multiply or Burn mode.
In some images, I also do the following to get a unifying colour layer to overlay the image.
Duplicate original image (not the manipulated one):
a) Filters, Blur > Gaussian Blur (350 pixels)
b) Colour > Auto > Colour Enhance
c) again - Filters, Blur > Gaussian Blur (350 pixels)
d) Combine down in 'Colour' mode at around 30% opacity.
I sometimes also use tone-mapping (I Googled it and followed a tutorial)
2) The Distortions
There are two distortions that I use.
a) Reverse Polar Coordinates
I explained that on my blip for 11th June.
b) The framed ones (I have posted 3 recently - the last was 'Lobster Pots') use mormal polar coordinates.
Filters > Distorts > Polar Coordinates ...
The default settings generate the 'mini-planet' effect but moving the slider 'circle depth in percent'to Zero, creates the rectangular framed images that I have posted.
NB. Initial preparation will be necessary to hide the seam.
I hope this helps you and others who wish to try it.
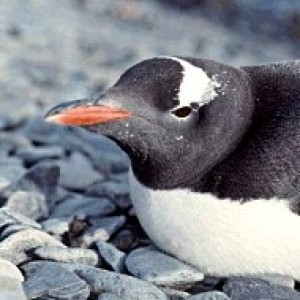
The original unaltered image can be seen here.
Comments
Sign in or get an account to comment.


