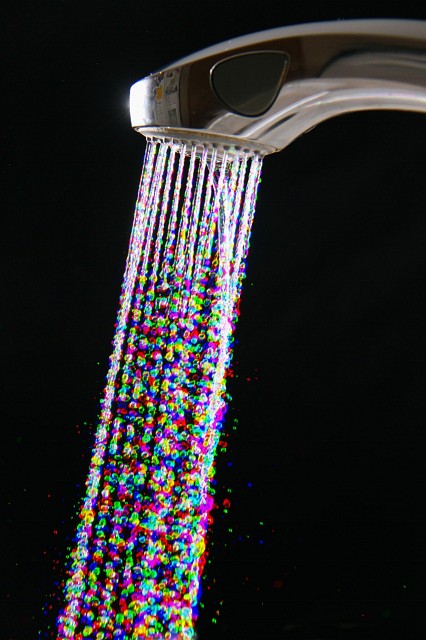
Rainbow Faucet
Back when I was shooting film, I would often fan my spark of creativity and experiment my making exposures using the Harris Shutter Effect.
This involved multiple exposures of the same scene using red, green, and blue filters. When finished, the image would render anything that moved with one of the filtered colors, while any static object would appear normal. It was tricky and time consuming, but occasionally the resulting photo would be quite rewarding.
Now with digial cameras and Photoshop, the technique is much easier to accomplish. You must use a tripod, but no filters are required...
1) Take three images of the same scene using a tripod and identical exposures.
2) Open all three images in Photoshop.
3) Pick the first image to be the "Master" and open the Channels Palette.
4) Select the second image and click on the "Green" channel.
5) With only the Green channel visible (it should appear as a monochrome image), Select All and Copy.
6) Return to the "Master" image and click on the Green channel.
7) Paste the Green channel data from the second image into the Green channel of the "Master" image.
8) Select the third image and click on the "Blue" channel.
9) Select All and Copy.
10) Paste the Blue channel data from the third image into the Blue channel of the "Master" image.
11) Make sure all channels are active (RGB) in the "Master" image and proceed with your normal optimization workflow.
676
views
- 1
- 1
- Canon EOS 7D
- f/5.0
- 70mm
- 400
Comments
Sign in or get an account to comment.


