
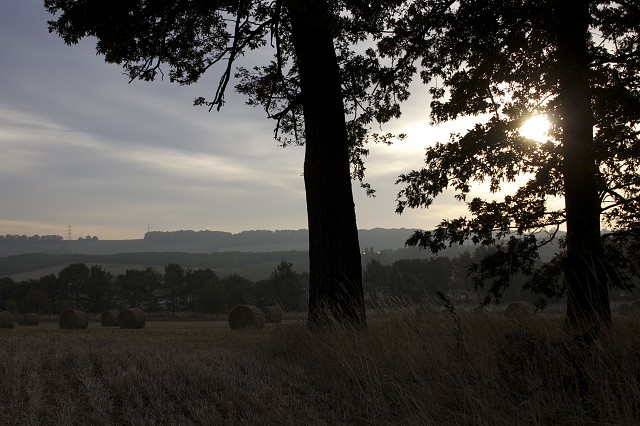
Dotty field...
... and sun-streaked morning
[finished version on my [url=http://www.blipfoto.com/entry/1407441]Kinda Horrigans[/url] journal]
The main difference between these two shots is the tone and exposure. Now, I have to confess - I pushed the 'After' shot too far and over-sharpened it / edited it clumsily which irritates me enormously. But everyone makes mistakes, right?
So, with this - I did the 'two goes at processing the RAW file' trick. Processed the RAW file once so that the sky was properly exposed. Processed it again so that the foreground was properly exposed. Then, copied on onto the other in Photoshop and used layer masks to mask off the bits of the images I didn't want to end up with a much more balanced exposure.
After that, there wasn't really too much in the way of processing. I applied a photo filter layer to warm the tones. Then duplicated that layer and changed the blend mode to multiply and dropped the opacity right down. I used a layer mask to delete the effect from everything other than the sky - and doing this brought out the rich golden tones in the sky. Then, used the polygonal lasso tool to select the sky (and feathered the selection by 100 pixels) and created a levels adjustment layer to darken and deepen the sky. After that, a 50% neutral grey layer set to overlay blend mode and a bit of dodging and burning on the bales etc.
Then sharpend... too much... *kicks self*... then flattened and saved.
Tip of the Day:
Another day, another landscape where I really struggle to compose it properly. So, today's tip is 4 Rules of Composition for Landscape Photography which is a nice simple place to get started!
306
views
- 0
- 0
- Canon EOS 50D
- 37mm
- 200
Comments
Sign in or get an account to comment.


