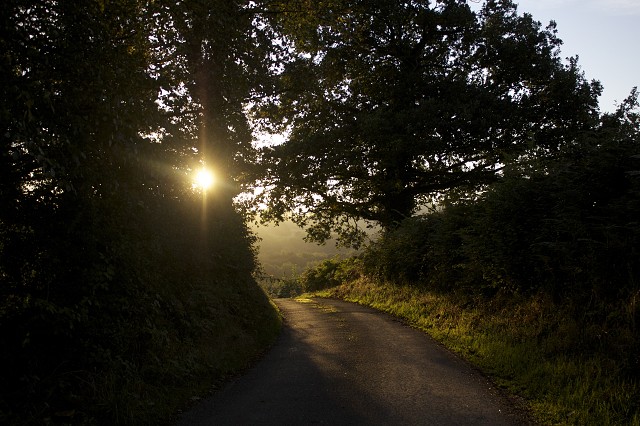
Bright patches...
... slightly obscured.
[finished version on my [url=http://www.blipfoto.com/entry/1419841]Kinda Horrigans[/url] journal]
Did the two times RAW file processing thing with this one to bring out some of the detail in the shadow area. Just process the RAW file as normal then open in Photoshop. Process the RAW file again, this time adjusting the exposure to bring out detail in the underexposed area. Then, in Photoshop, copy one on top of the other and apply a layer mask... then use a black brush to paint out the bits you don't want until you get a balanced exposure.
Additionally, dodged some of the areas to lighten a little and used a warm photo filter layer just to bring out the golden morning tones. Sharpened the edges. Flattened and saved.
Tip of the Day:
Just a random link today but if you're interested in product photography, knowing how to do it without studio lighting and the like is tricky - this article explains 'How to take Better Product Photographs for Free' and has some nice tips. Even if you're just into macros / still life, there are some bits in there to think about.
426
views
- 0
- 0
- Canon EOS 50D
- 25mm
- 400
Comments
Sign in or get an account to comment.


