Going It Alone
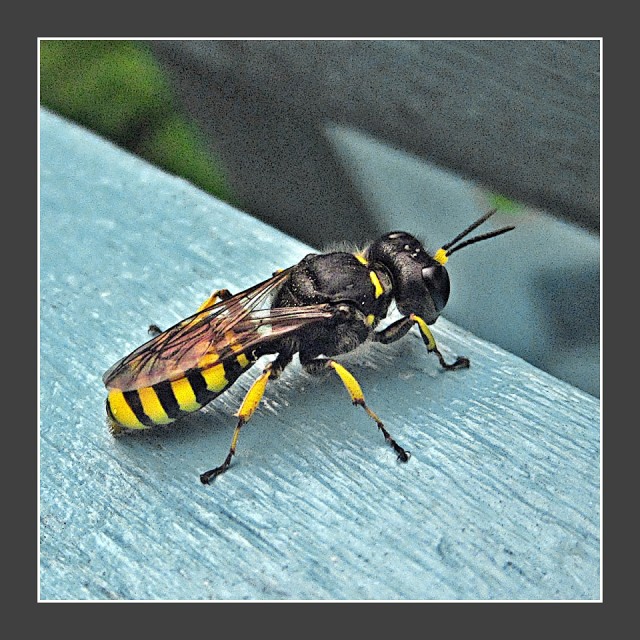
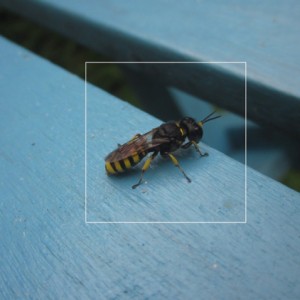
This is a solitary wasp of the genus Ectemnius that was sitting on the patio furniture when I went to refill the bird feeders early this morning. There was a bit of a chill in the air and that is why I think this insect was so cooperative while I poked a lens within a few centimetres of it and took a total of 12 shots.
It is either Ectemnius lapidarius or Ectemnius cavifrons, I am drawn to the former.
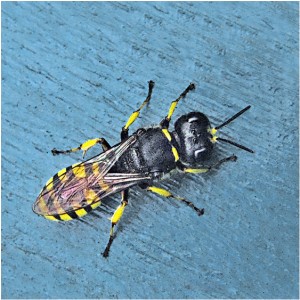
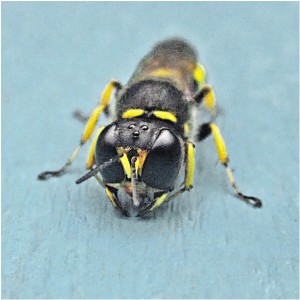
This oblique view is my main blip but I have added a dorsal view and a frontal view as extras.
In all of them, you can clearly see the triangle of small black domes on the top of its head. These are the wasp's sat-nav system used by all insects that have to find their way home. They are simple eyes that are sensitive to polarised light and are called 'ocelli'.
TUTORIAL
========
My final 'extra' is the original image straight out of the camera and shows the need for learning to use a Graphic Image Manipulation Program. My own favourite is the free one - GIMP.
Post-capture processing is not the ideal and if you are specialising in insect photography then kit yoursef out with the appropriate hardware.
However, I am an opportunist blipper and prefer to use lightweight portable gear - a super-zoom bridge camera and a pocket compact - so as to be ready to capture whatever presents itself.
Knowing that the image is going to be processed, I always under-expose by 1/3 (sometimes 2/3) of a stop because it is easier to pull details out of the shadows than it is to put detail back into blown highlights. Under-exposure also gives greater colour saturation.
OK then, so what did I do to my original captured image today? The main steps were:-
1) Simple adjustments in 'curves'.
2) Tone mapping* to bring out the detail in the shadows whilst also enhancing the detail in the highlights.
3) The patio furniture is painted bright cyan/pale-blue and since there was none of this in the insect, I used 'Hue-Saturation' to desaturate the cyan by 80% and increase its lightness by 10%. (boosted yellow by 20% as well).
4) Sharpen with 'unsharp mask'.
*Tone Mapping (Google it for more info)
a) Duplicate layer
b) De-saturate
c) Invert
d) Gaussian blur with a radius equal to 10% of the average pixel dimensions (eg 350 for an image 4000x3000 pixels)
e) Reduce opacity to 75%
f) Recombine layers using the 'Soft Light' mode.
Comments
Sign in or get an account to comment.


