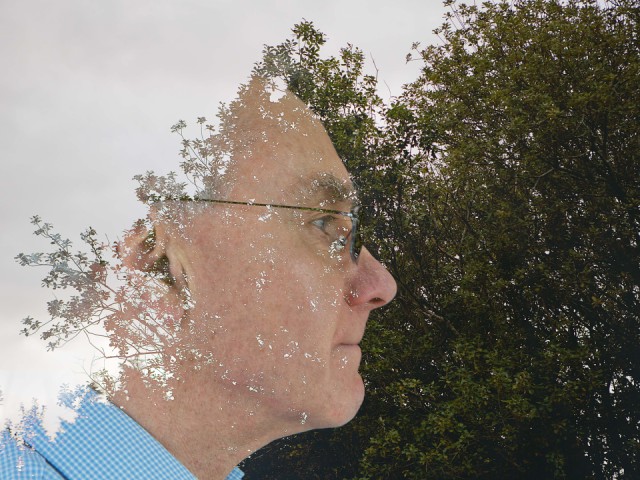
Double Exposure
I've seen several examples of this technique, but it's the first time I've tried it myself.
The image was created in camera: no Photoshop trickery required. The first exposure is the portrait, taken against a black background. The second exposure, over the top of the first, is the trees and sky. The two are combined in camera, which is set to save the brightest part of each exposure. The skin is brighter than the trees, so is visible in front of the leaves. However, the sky is brighter than the skin, so obliterates the skin.
It took me several attempts to get it right, firstly finding the correct setting on the camera to achieve this effect, and secondly getting the two exposures to align correctly. It was much easier once I realised that, using live view for the second exposure, the display showed the first recorded image as well as the scene in front of the camera, allowing the overlap to be judged before pressing the shutter release.
I am reasonably happy with the result, but could probably do better another time (eg by using a more attractive model!).
Comments
Sign in or get an account to comment.


