
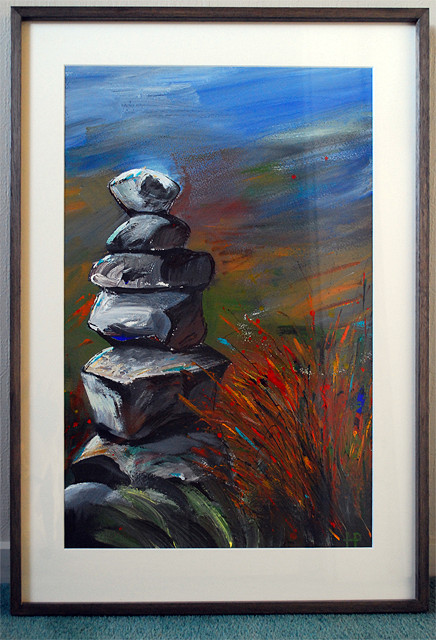
The cairn painting
A while ago I mentioned I wanted to blip a painting I'd done for Dr B last Christmas, which is now framed. Unexpectedly I got the opportunity to blip it today and here it is.
I couldn't avoid a bit of a reflection and I'm too tired to fiddle around in Photoshop getting rid of it. You get the general idea.
I parted with a tidy sum of money at the dentist today. No work done, just my annual check up and 'spit and polish' from the dental hygienist. Come to think of it I've parted with a number of 'tidy sums' lately and it isn't over yet.
Today was like mid-summer. It must have got into the late 20's, all balmy and making me want to smile :-) Summer, come to me summer!
I'm keen for a good nights sleep and hopefully I'll completely knock this low-level sniffle on the head.
Thanks for yesterday's comments and favourite votes. It was fun and easy to do.
Instructions for those who asked
I took lots of shots pretty much with the angle and piece of road marking I wanted. In Photoshop (and you could use PS Elements or another editing program), I cropped some a little bit, straightened a few and others I just resized.
I cropped/resized 640pxx 428px, then copied and pasted each cropped/resized image into one original road marking image {I deliberately took two shots of one image). Each small image was on a different layer and I used the rule guides and turned 'snap to guides' on (under view) to line everything up.
I just made it up as I went along but taking lots of differently angled shots of what I wanted made it easy. With each image on it's own layer I could move them round until I had the mix I wanted.
At the end I made another layer and created a thin grey stripe. Once I had the tone and thickness I wanted I replicated the line onto different layers and moved them around to create the borders (borders, what borders?! ;-).
Finally I cropped the image so the long edge was 640px.
I think I'll make one to hang on the wall :-)
502
views
- 0
- 0
- Nikon D60
- 1/13
- f/5.6
- 30mm
- 800
Comments
Sign in or get an account to comment.


